It's that time of year again – the time where we realize that Christmas is only 4 weeks away and we haven't even started purchasing presents, decorating the house, planning events, or most importantly, sending out the holiday cards. This year we wanted to do something that felt both personal and nostalgic, so we called up our friends at Lumi and asked if they would help us make a couple of rubber stamps and we ordered some paper from the fine folks over at French Paper Co. In no time we were stamping away and feeling more festive by the minute.
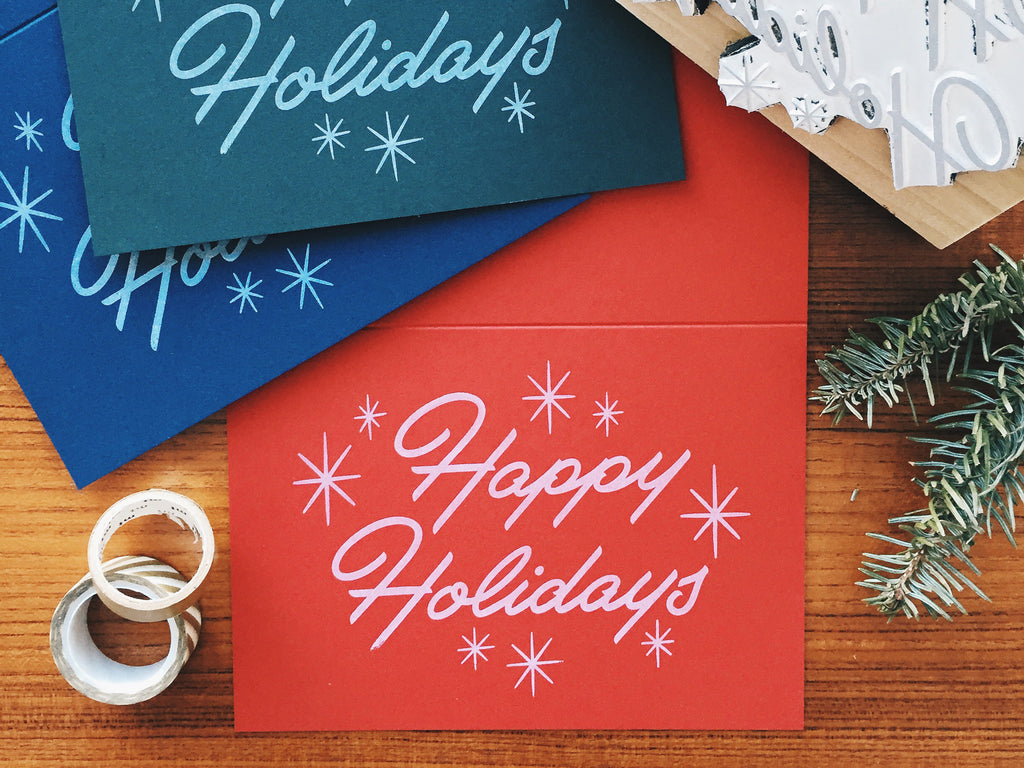
These designs were actually a part of a Christmas set I created last year for Anchor Paper Co. I didn't get them done in time for the season and they never saw the light of day. I knew I had something special with these designs so I kept them on the back-burner for the next holiday season. As Christmas rolled around this year Jason and I discussed putting together a few of our own holiday greeting cards and I immediately remembered my old holiday collection. They wouldn't work in their original format, so I took the basic lettering I had already created and added illustrative elements to acheive that nostalgic holiday spirit we so desired. The rubber stamp effect only enhanced the style we were going for.

Whenever I begin a new project I always start with pencil and paper, and this project was no different. I began by sketching out the old designs with new illustrative elements. I'm always inspired by vintage 1950's and 1960's era design. The charm and simplicity of that era still stands out to me even in 2015. This led me to spend a good amount of time scouring the internet and searching through 1950's christmas card images for inspiration. The warm colors, the beautiful shapes and the effects of limited printing processes are as charming as ever.
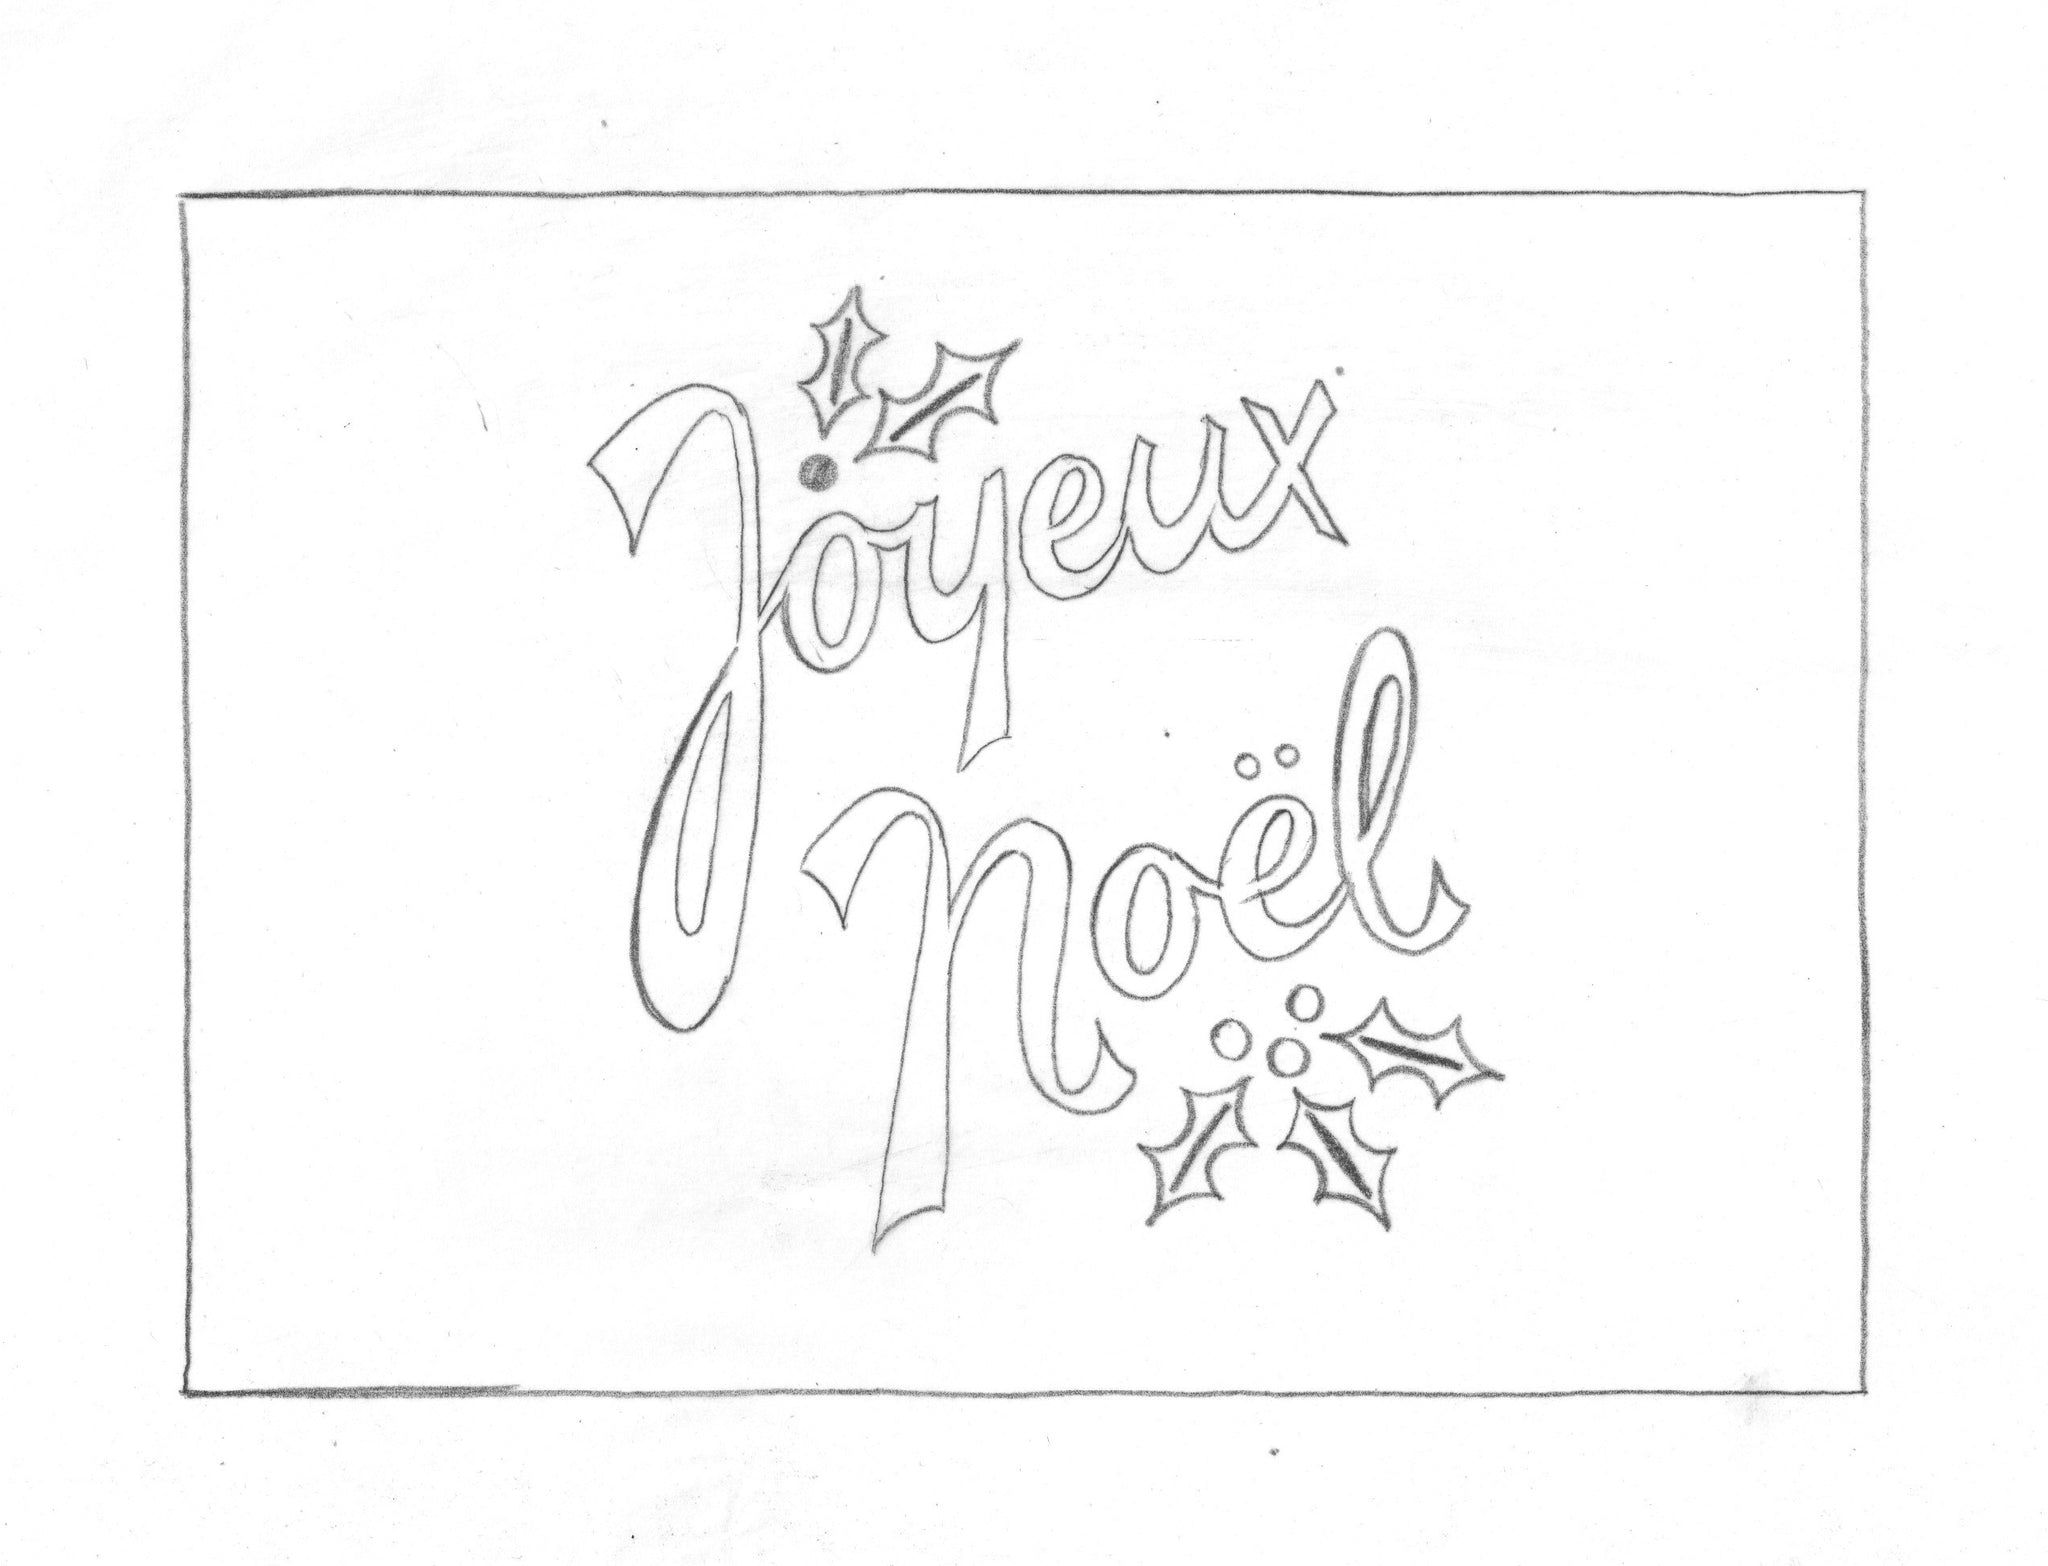
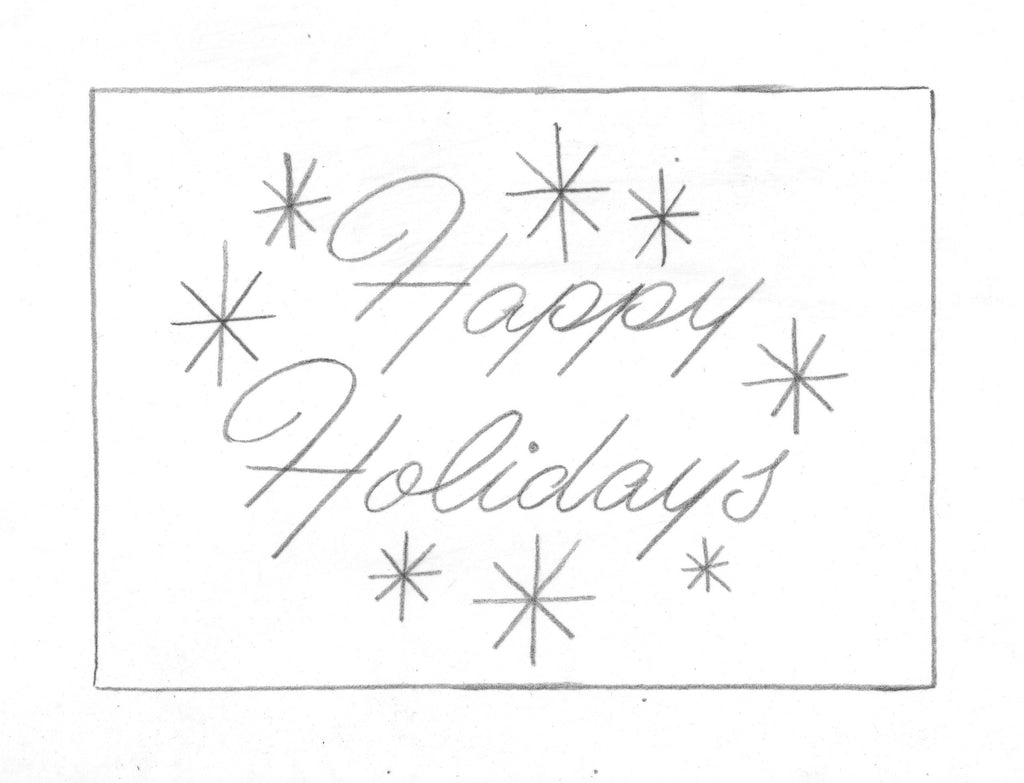
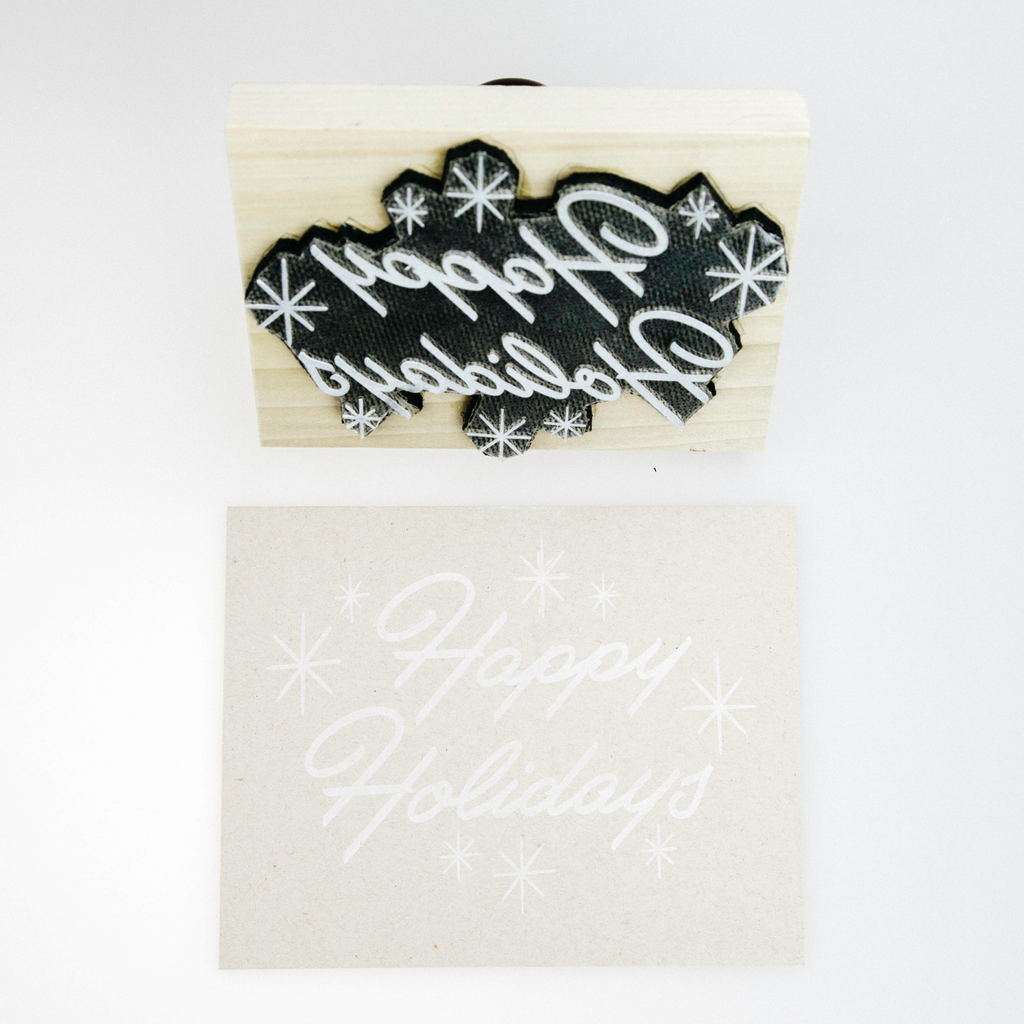
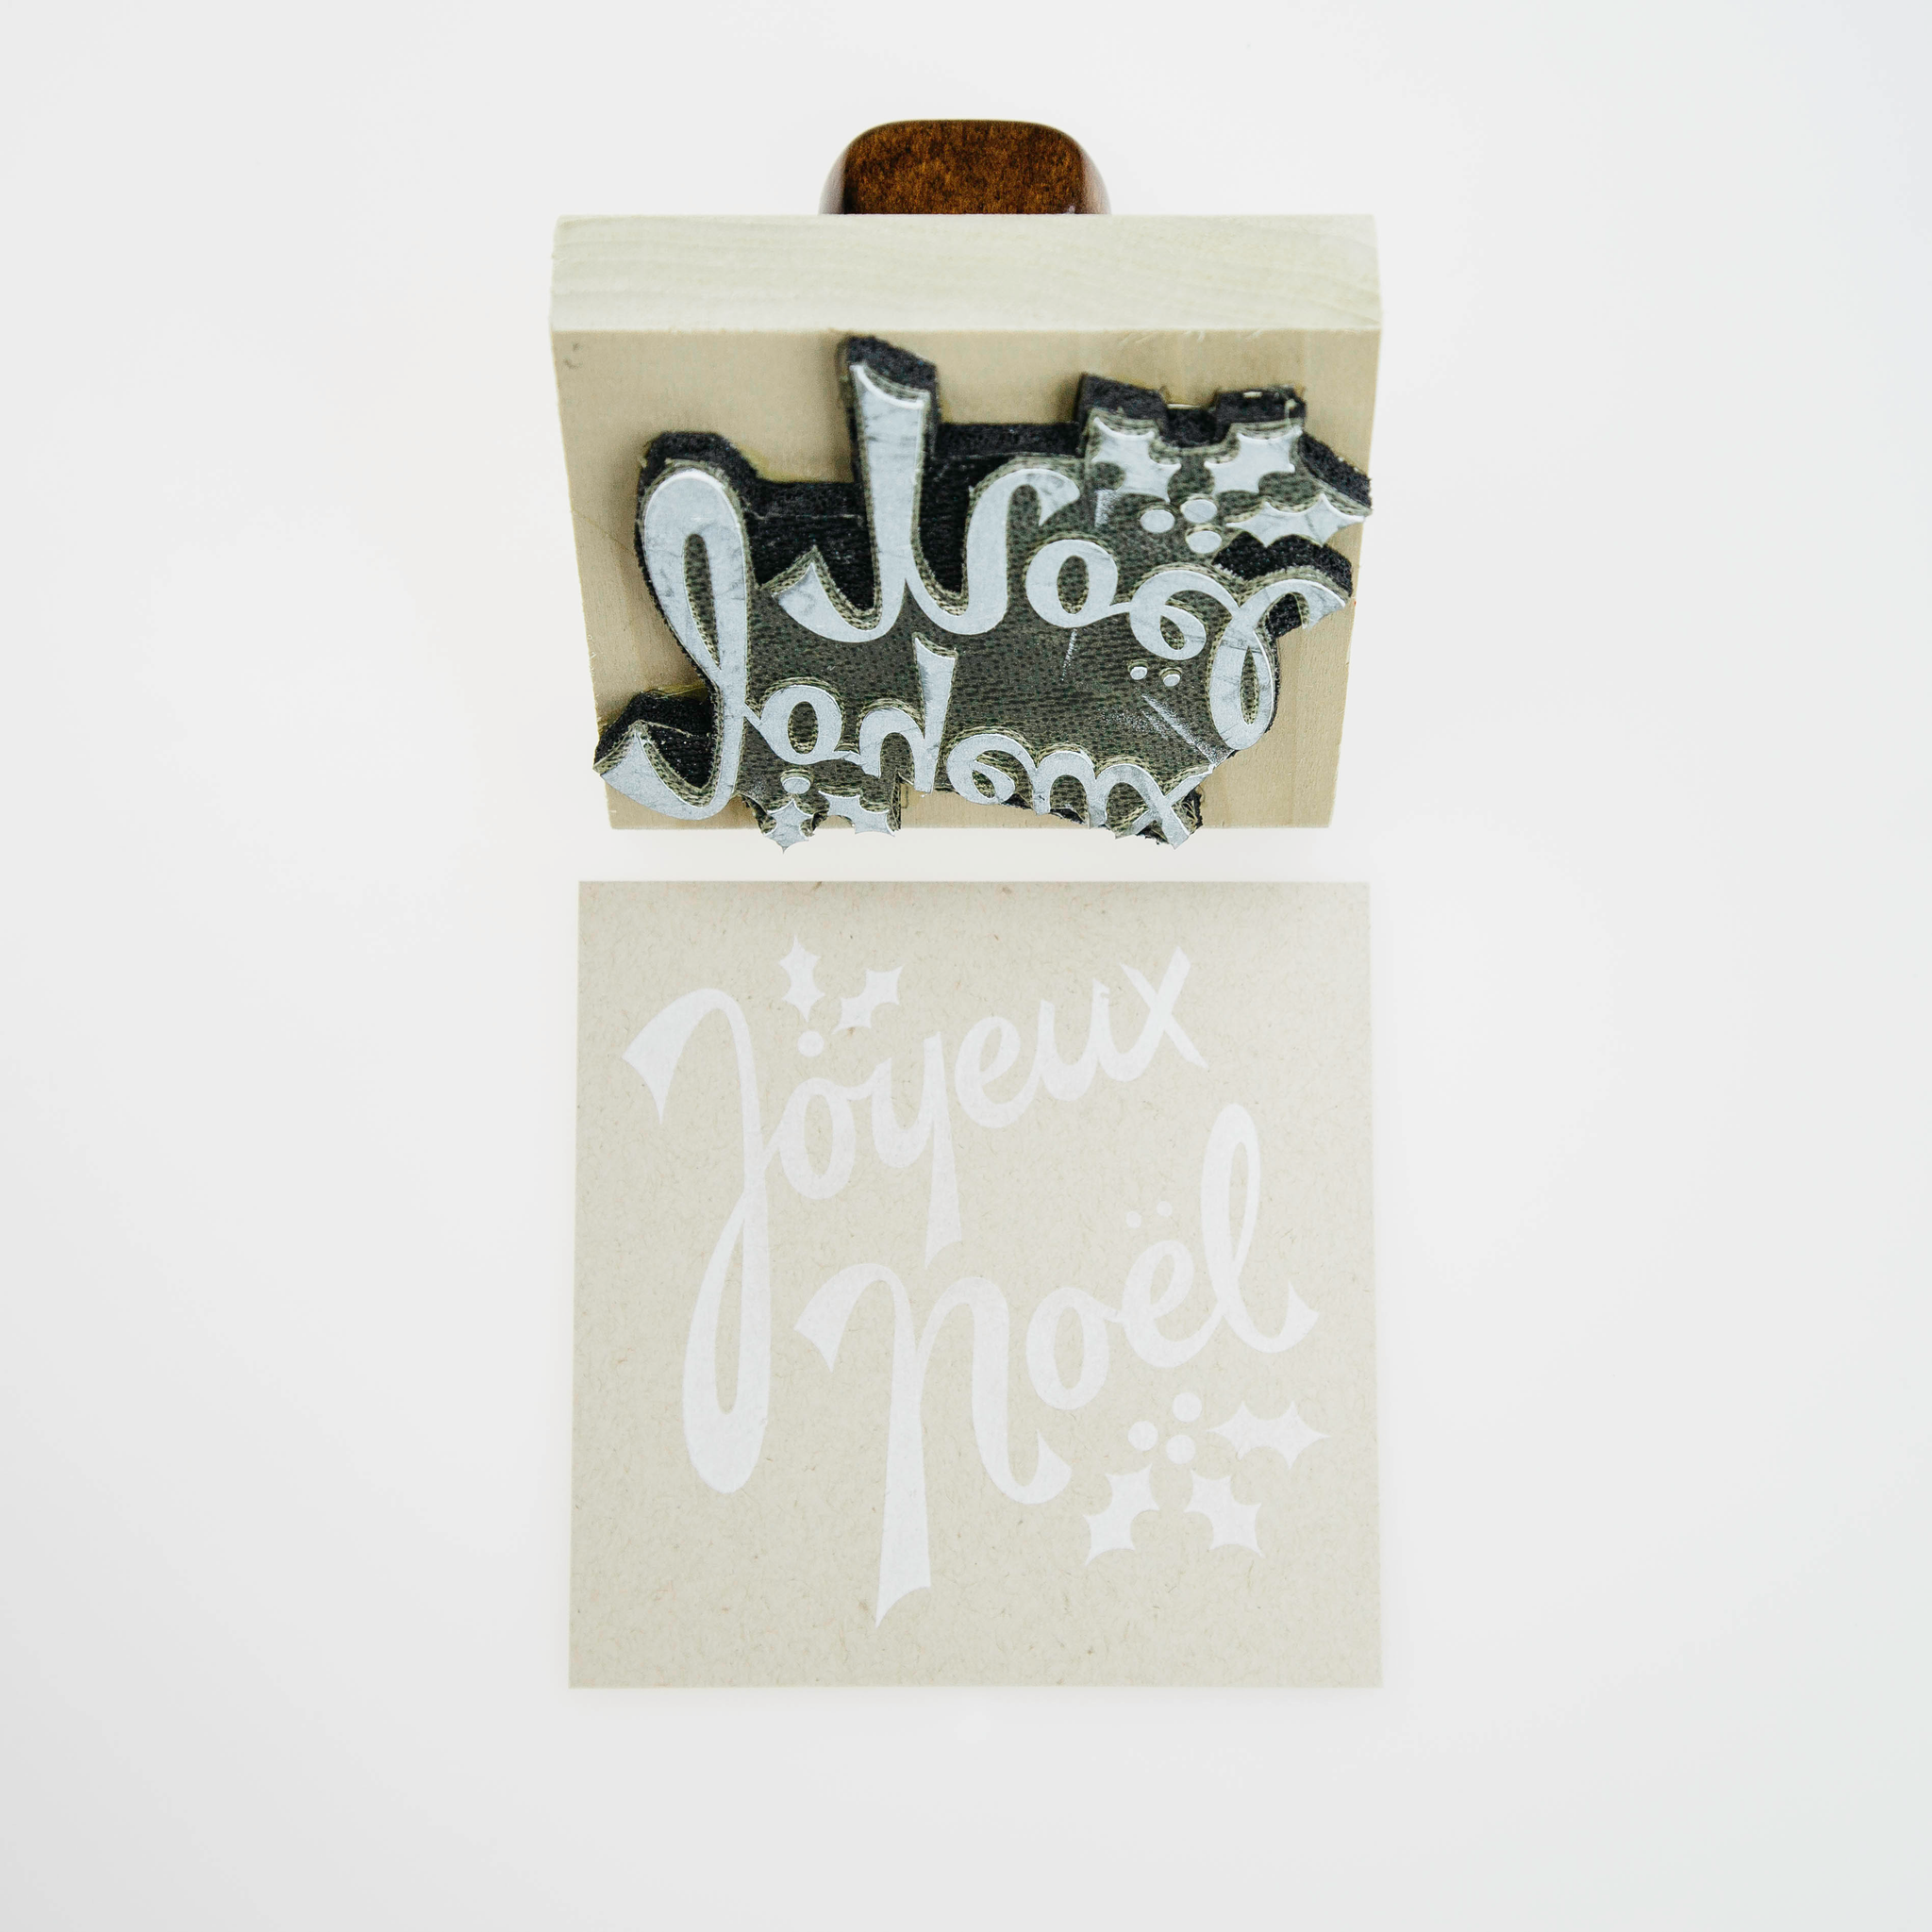
After working my way through a few ideas with Jason and getting the green-light to move forward I scanned the designs and brought them into Illustrator. The digitizing portion of the process somehow moves both very quickly and slowly simultaneously. As I move towards a print-ready project I quickly get sucked into details that probably don't matter much at all to the average viewer, but that are still rather important to me. Minute adjustments to placement, scale and curve adjustments can take hours and before long this simple project turns into an all nighter (well, it wasn't really an all nighter but you get the idea). The final results felt great but I knew the finishing touch would definitely be achieved by turning these designs into a rubber stamp, giving the designs a "craft" quality that many modern, vector items lack - a tactile, human character. Something about stamping the design onto paper immortalizes it, and the simpler the process the more timeless it feels.
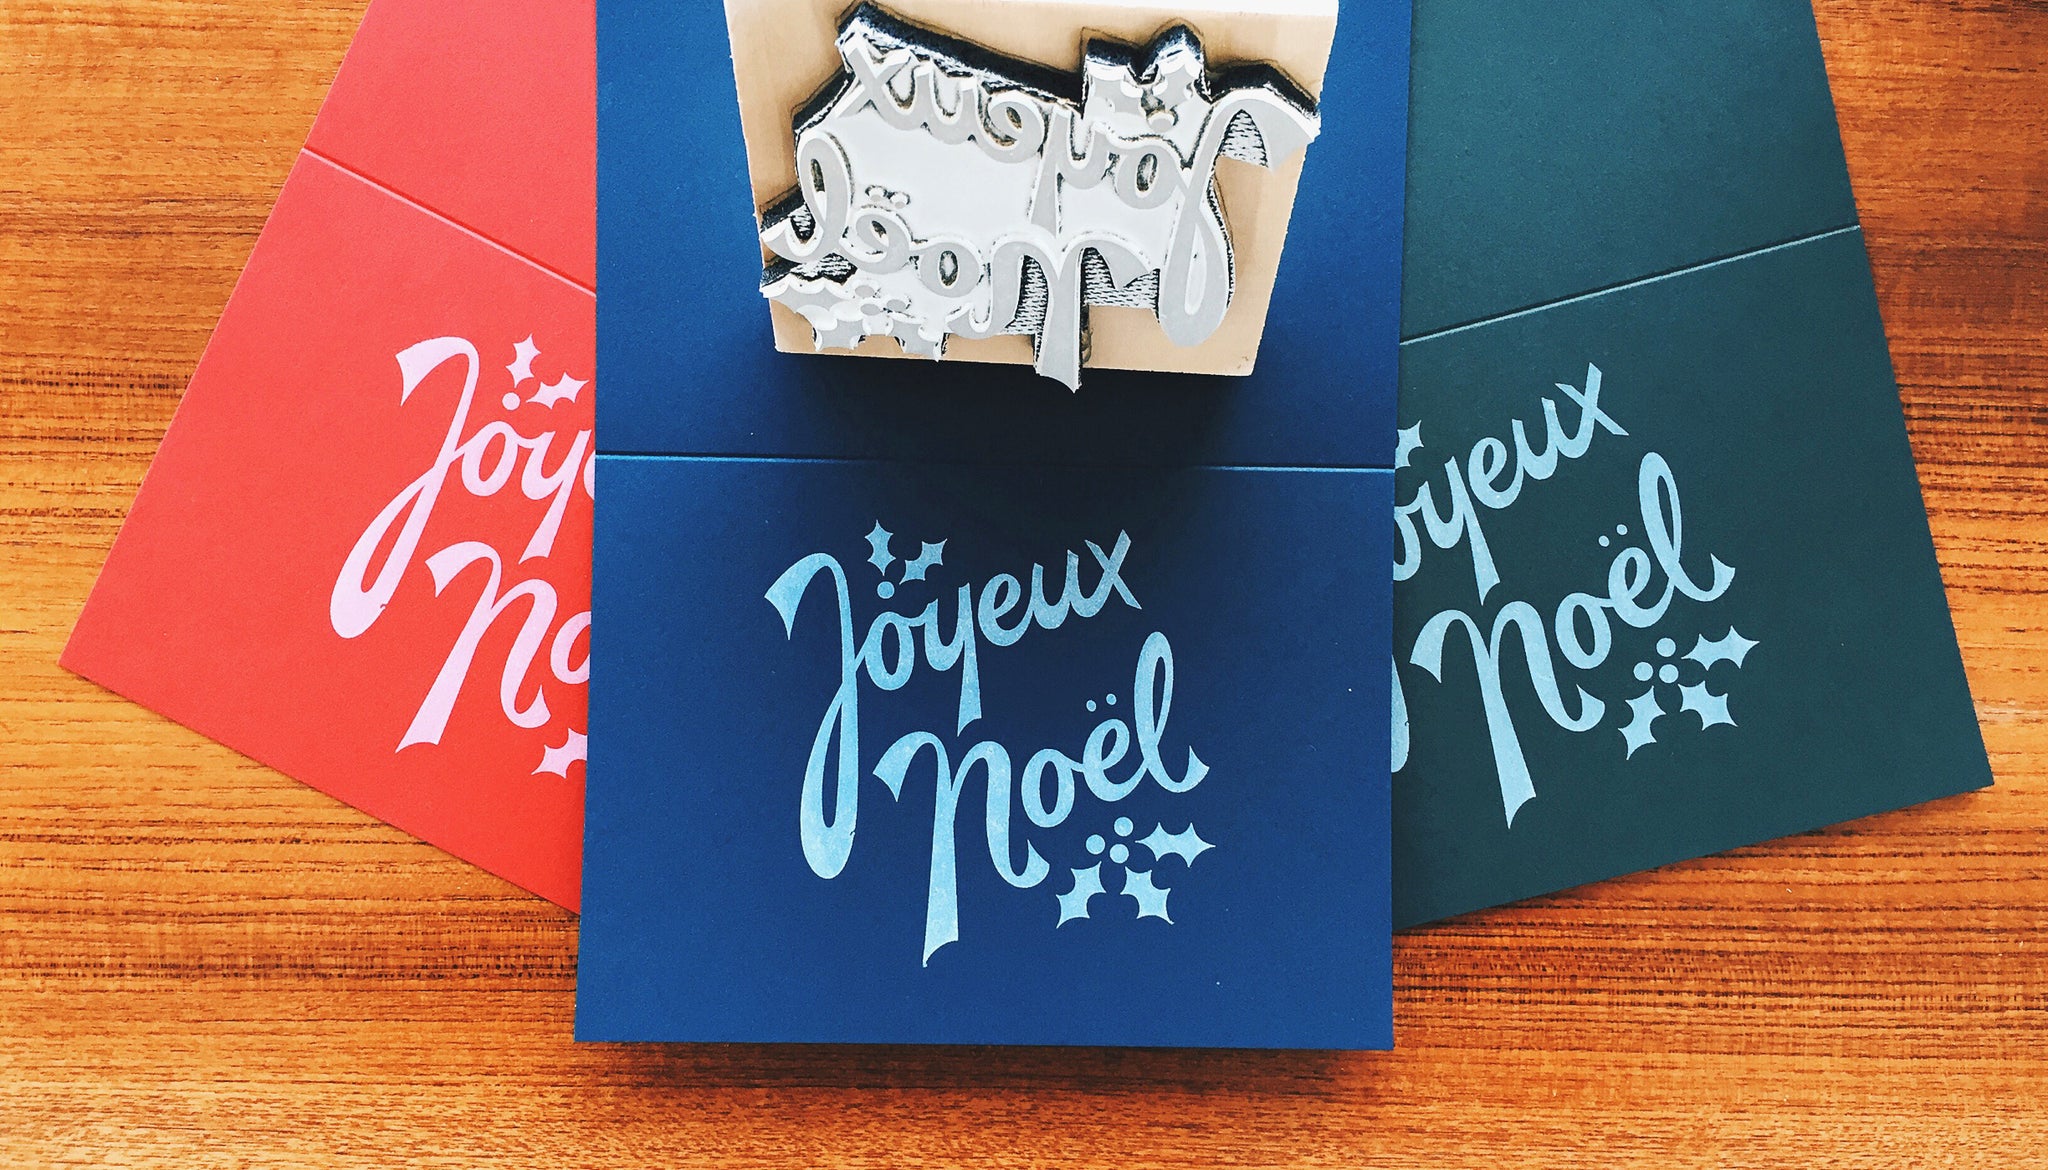
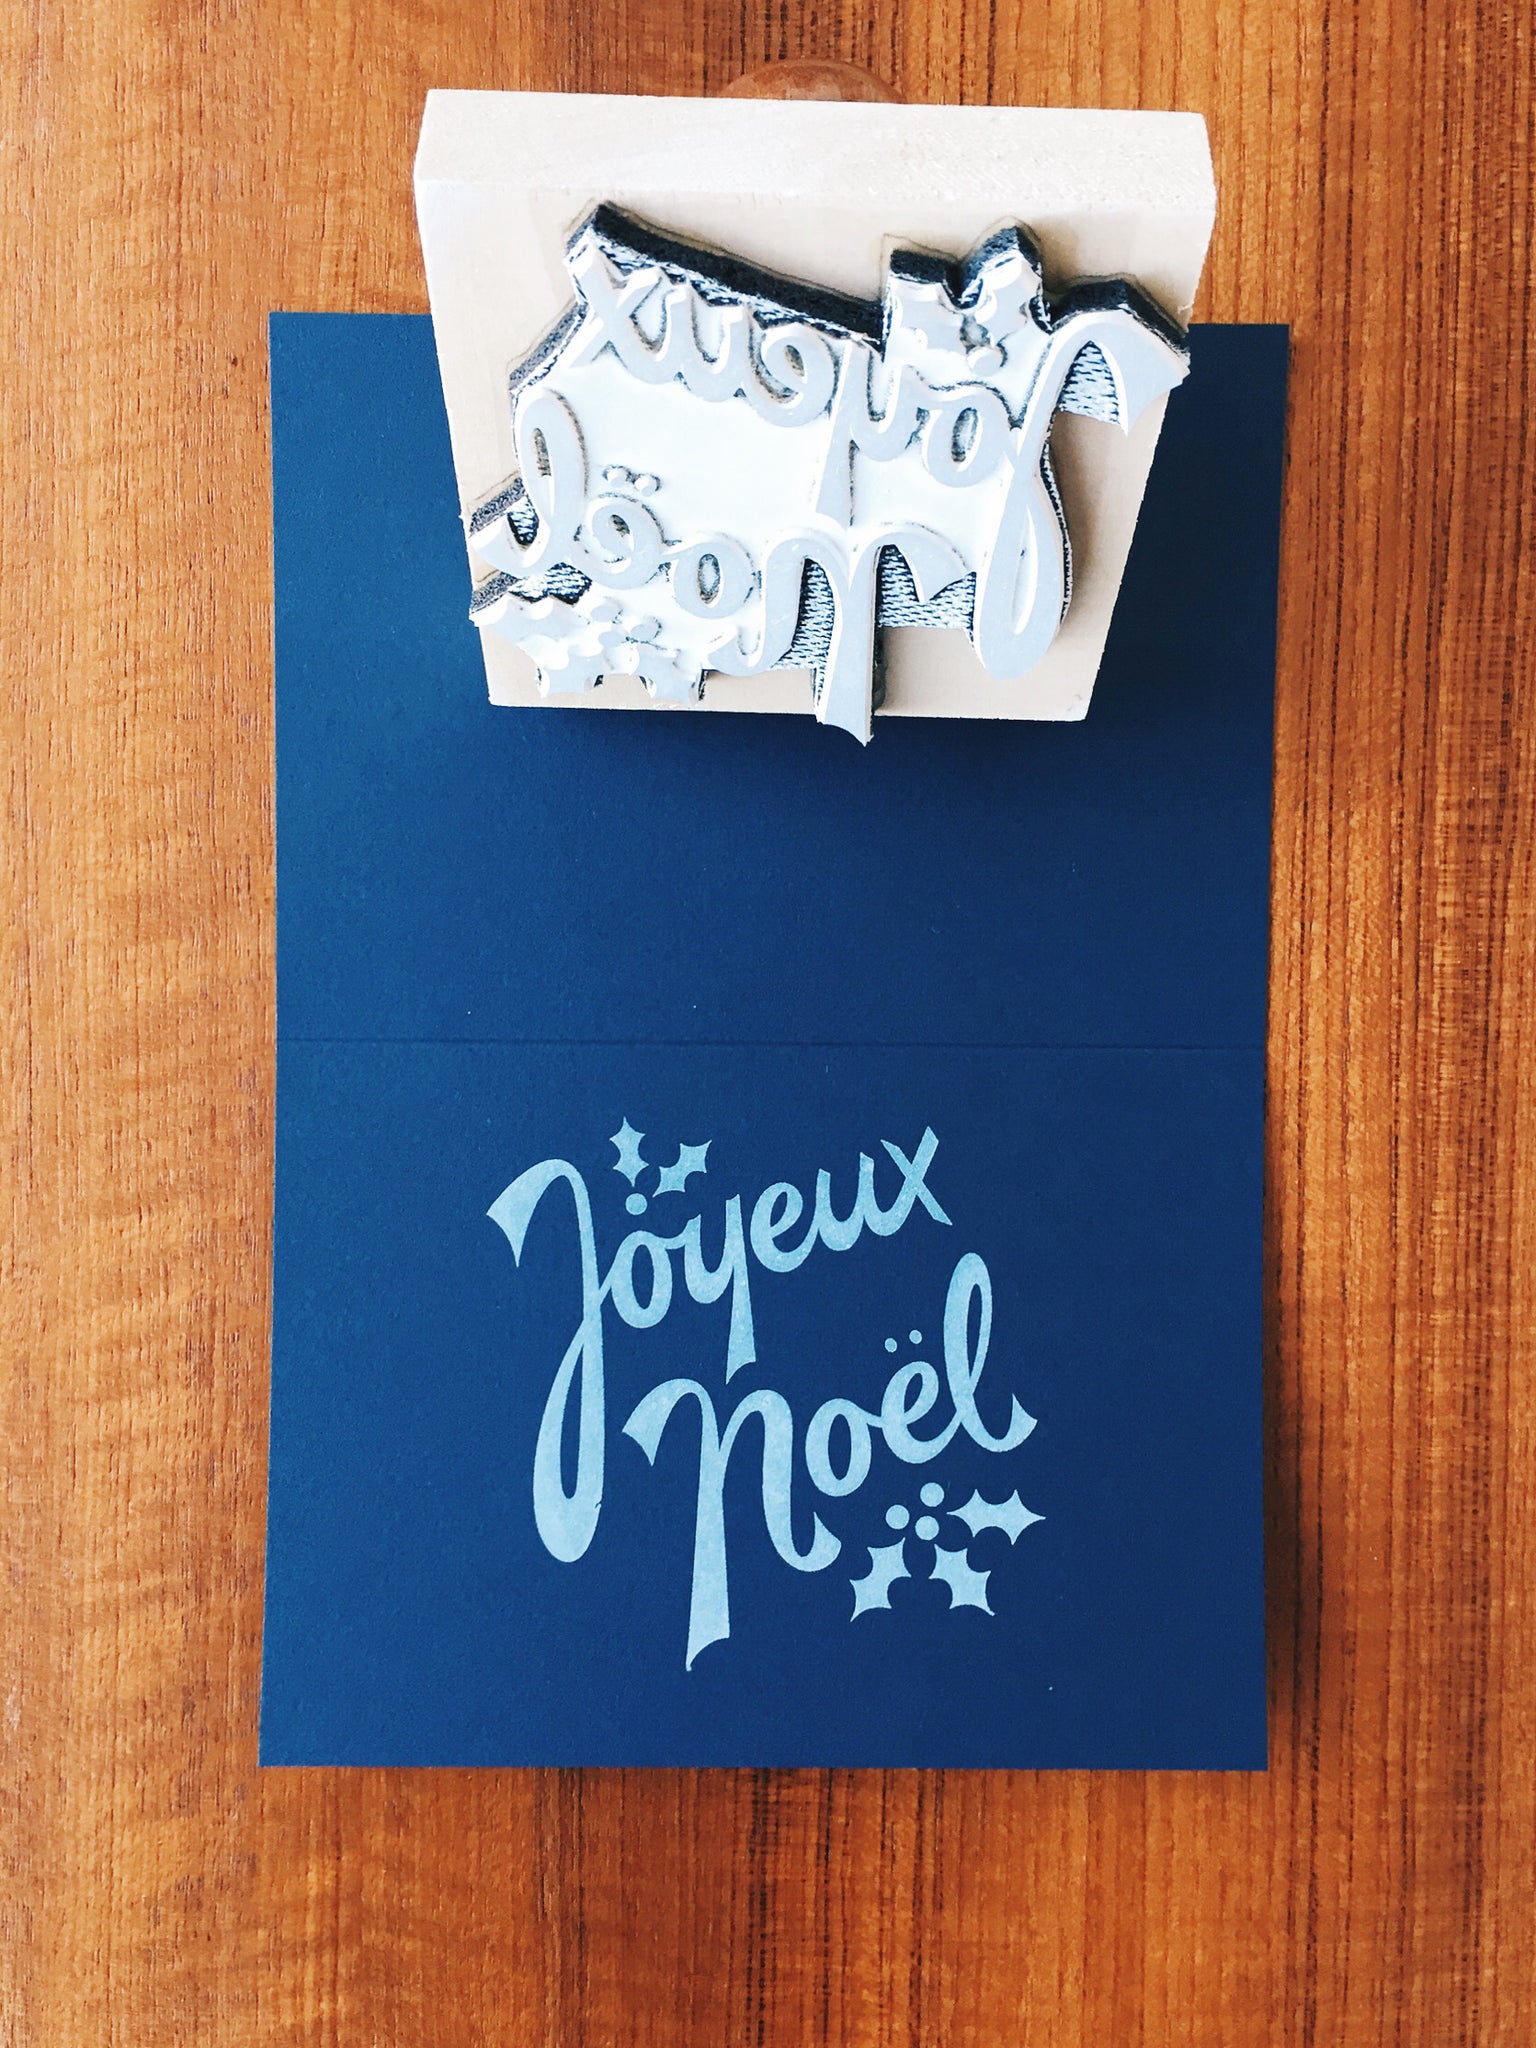
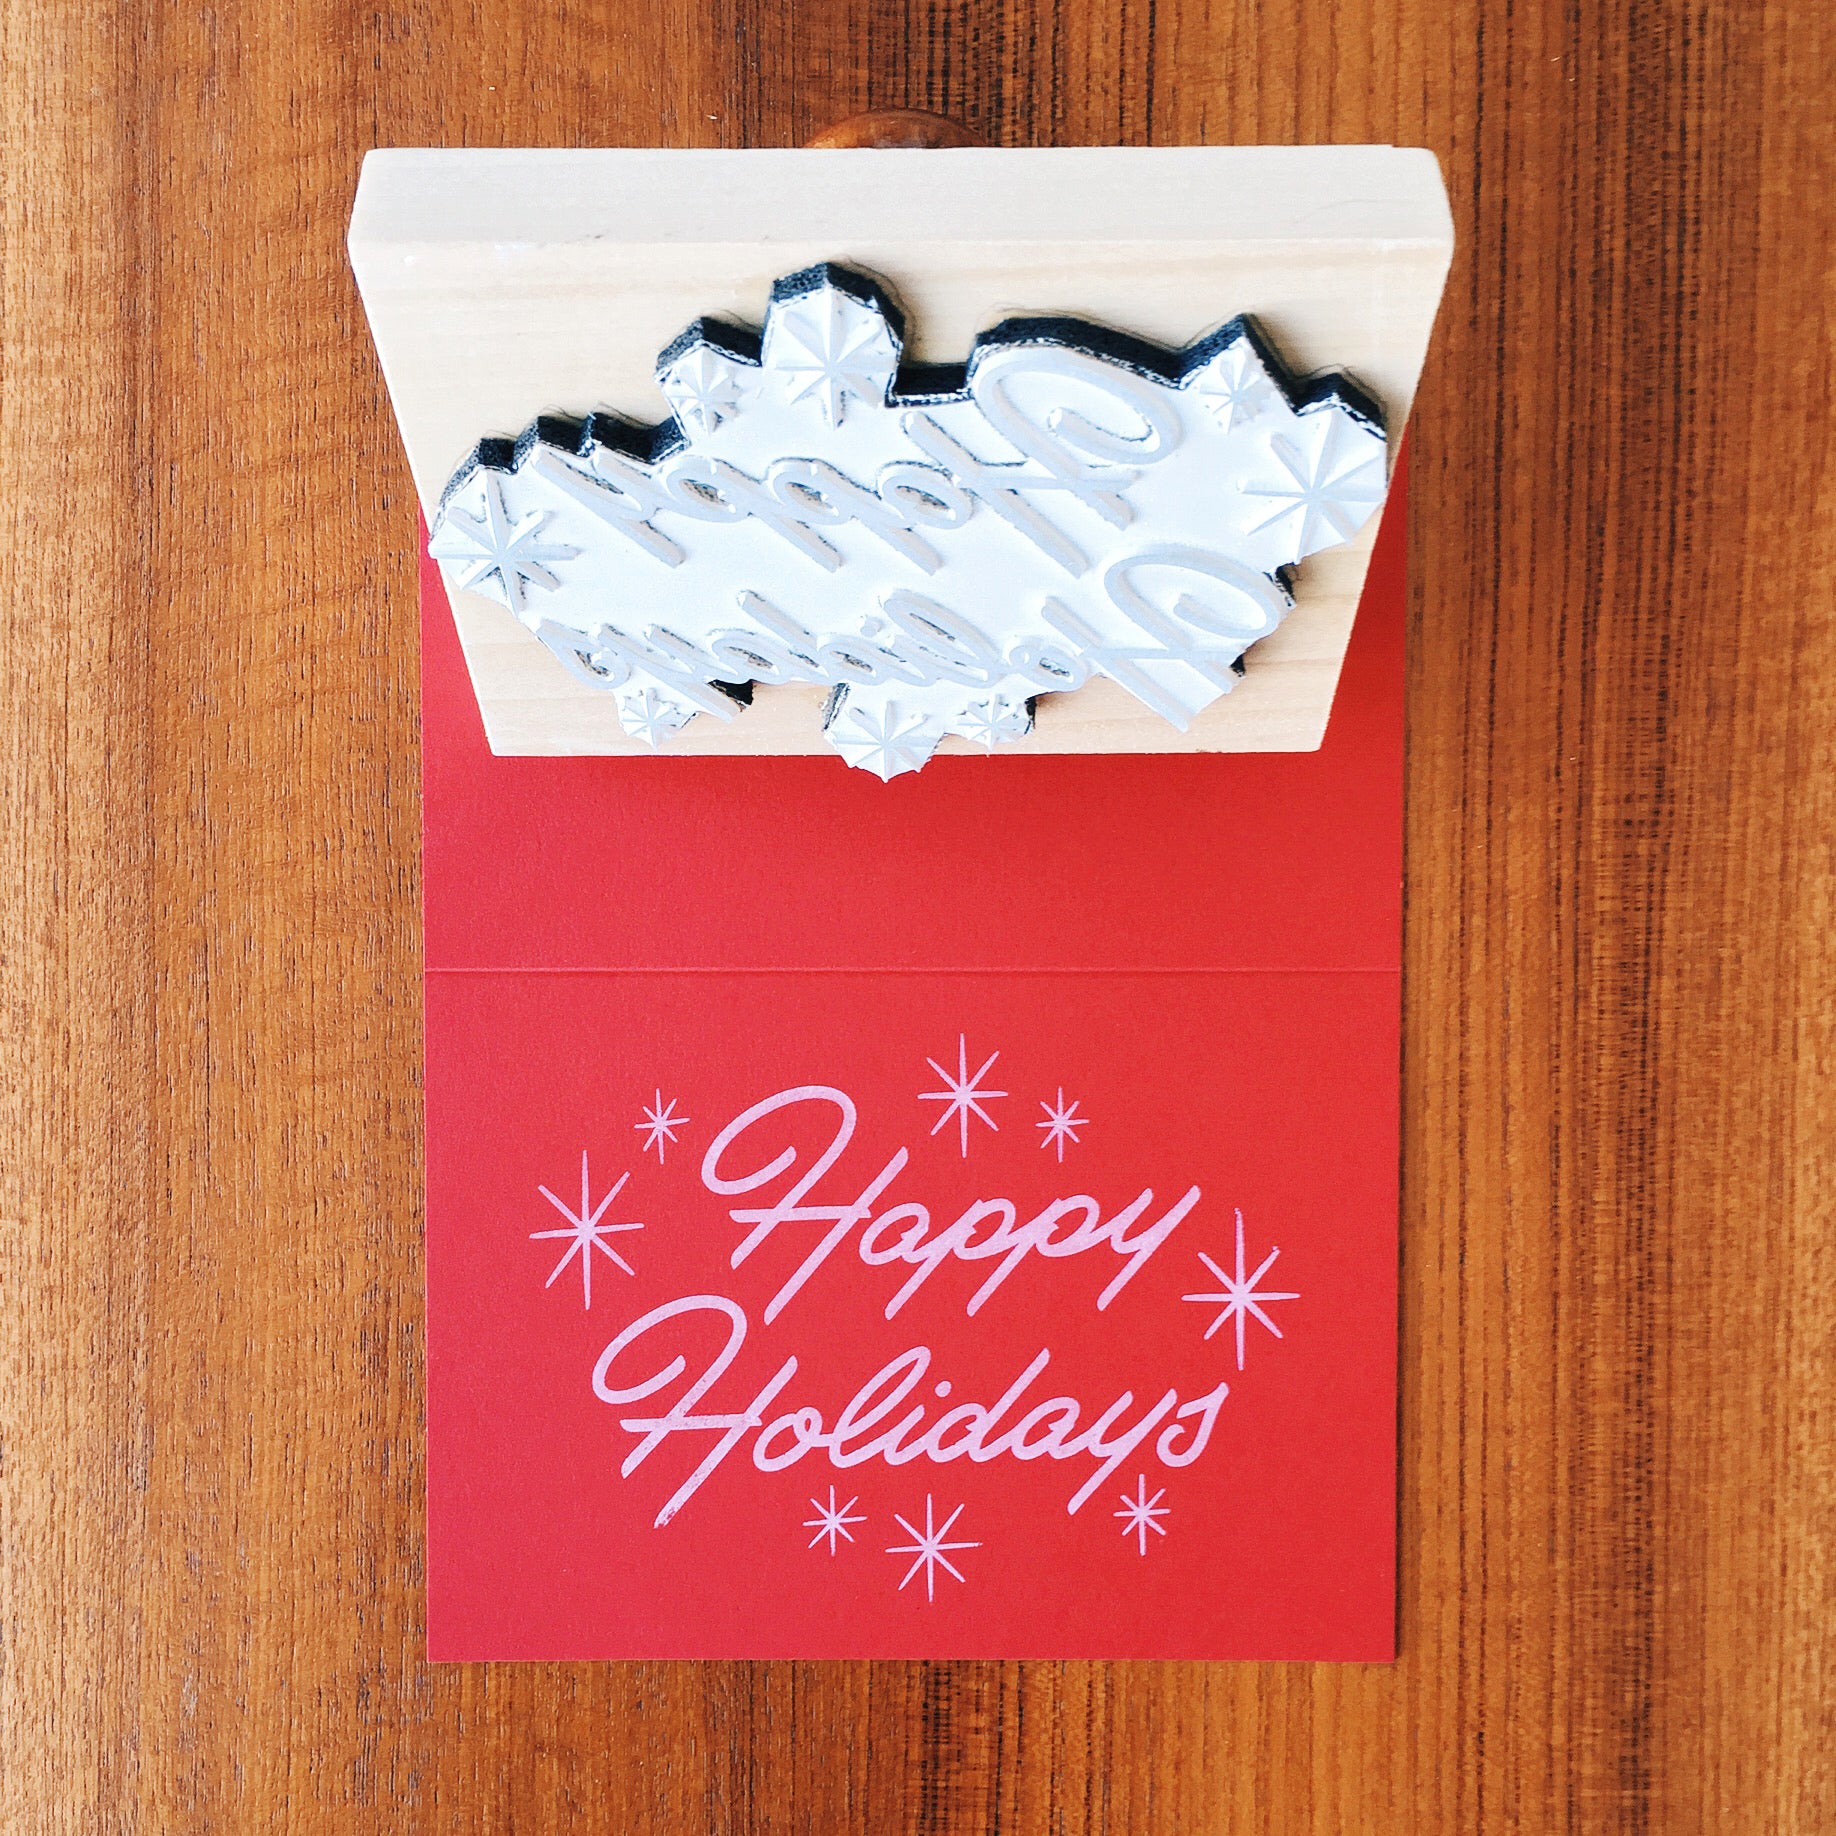
I ordered the stamps of the designs from our good friends at Lumi.
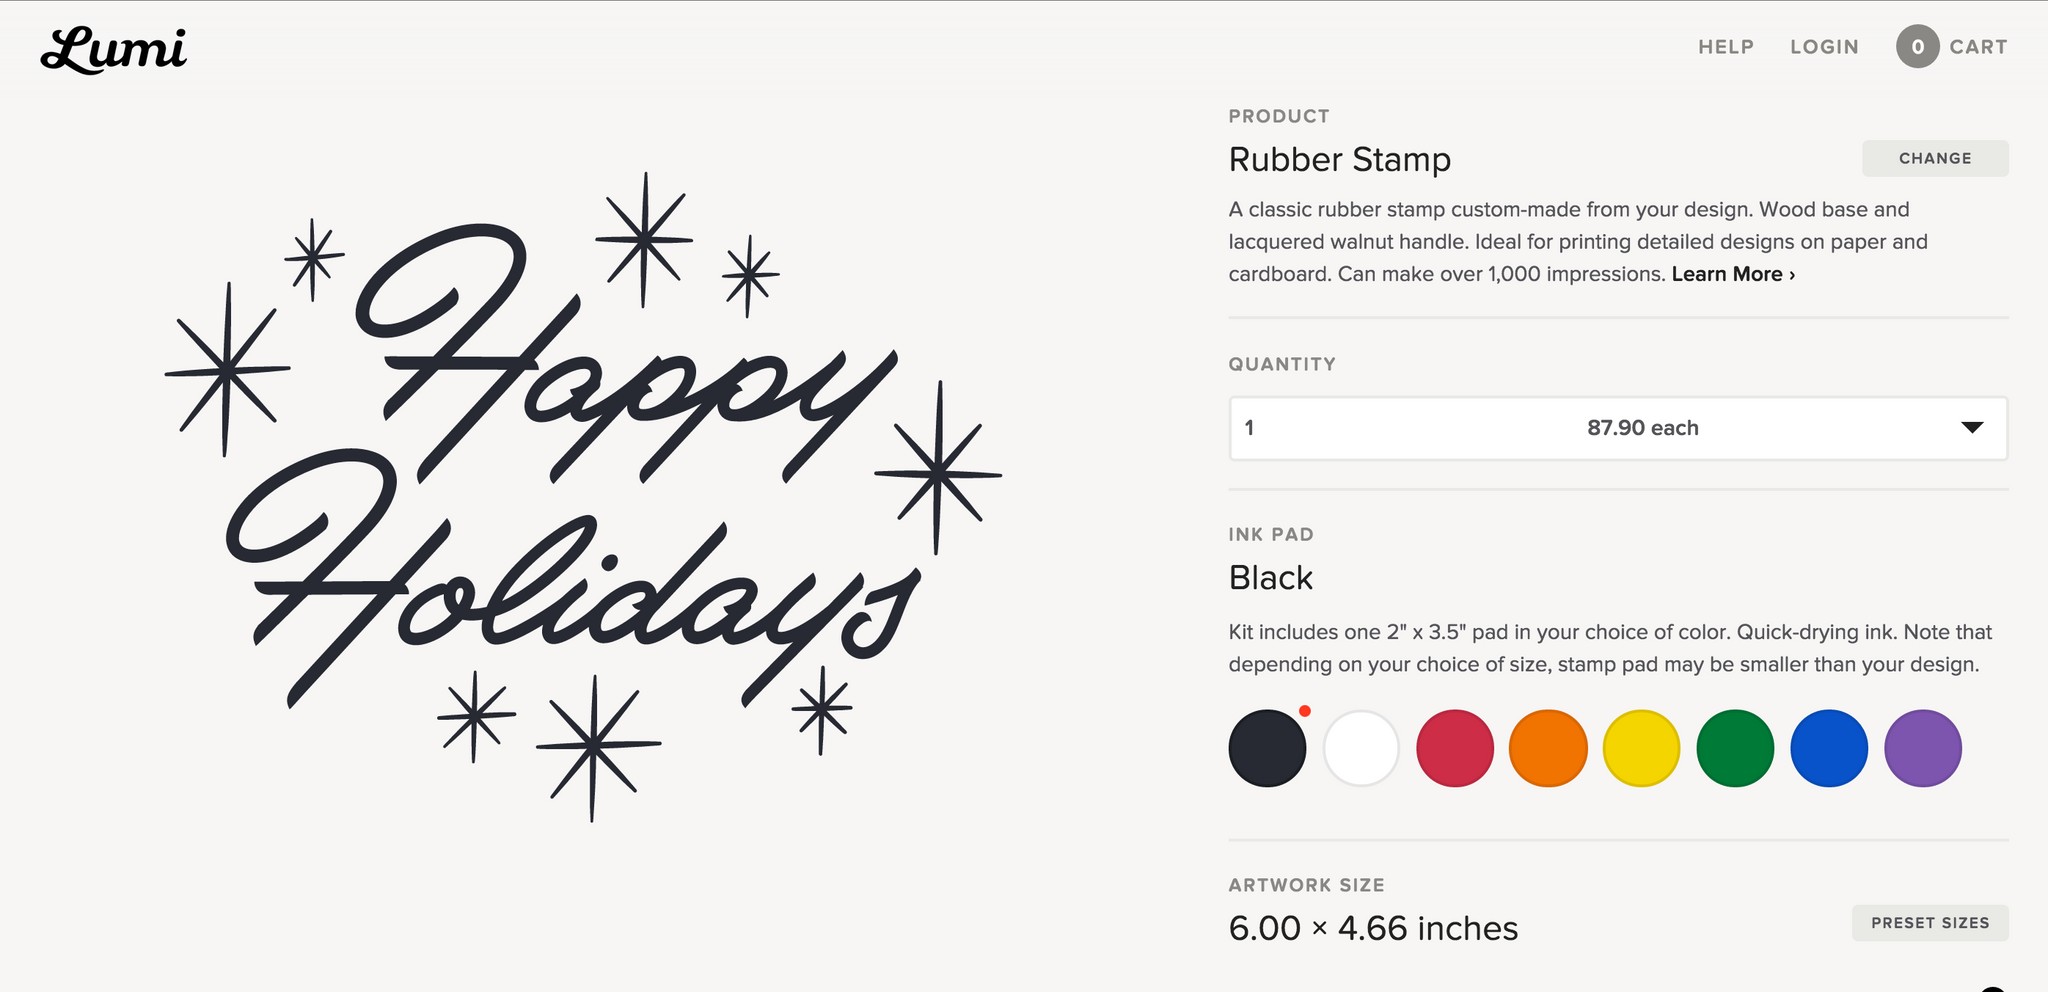
You can imagine my excitement when I received an email from Lumi with live images of the first tests! These looked just as good as I envisioned, and really lived up to our high standards of quality and aesthetics we've striven to maintain here at Carmel.
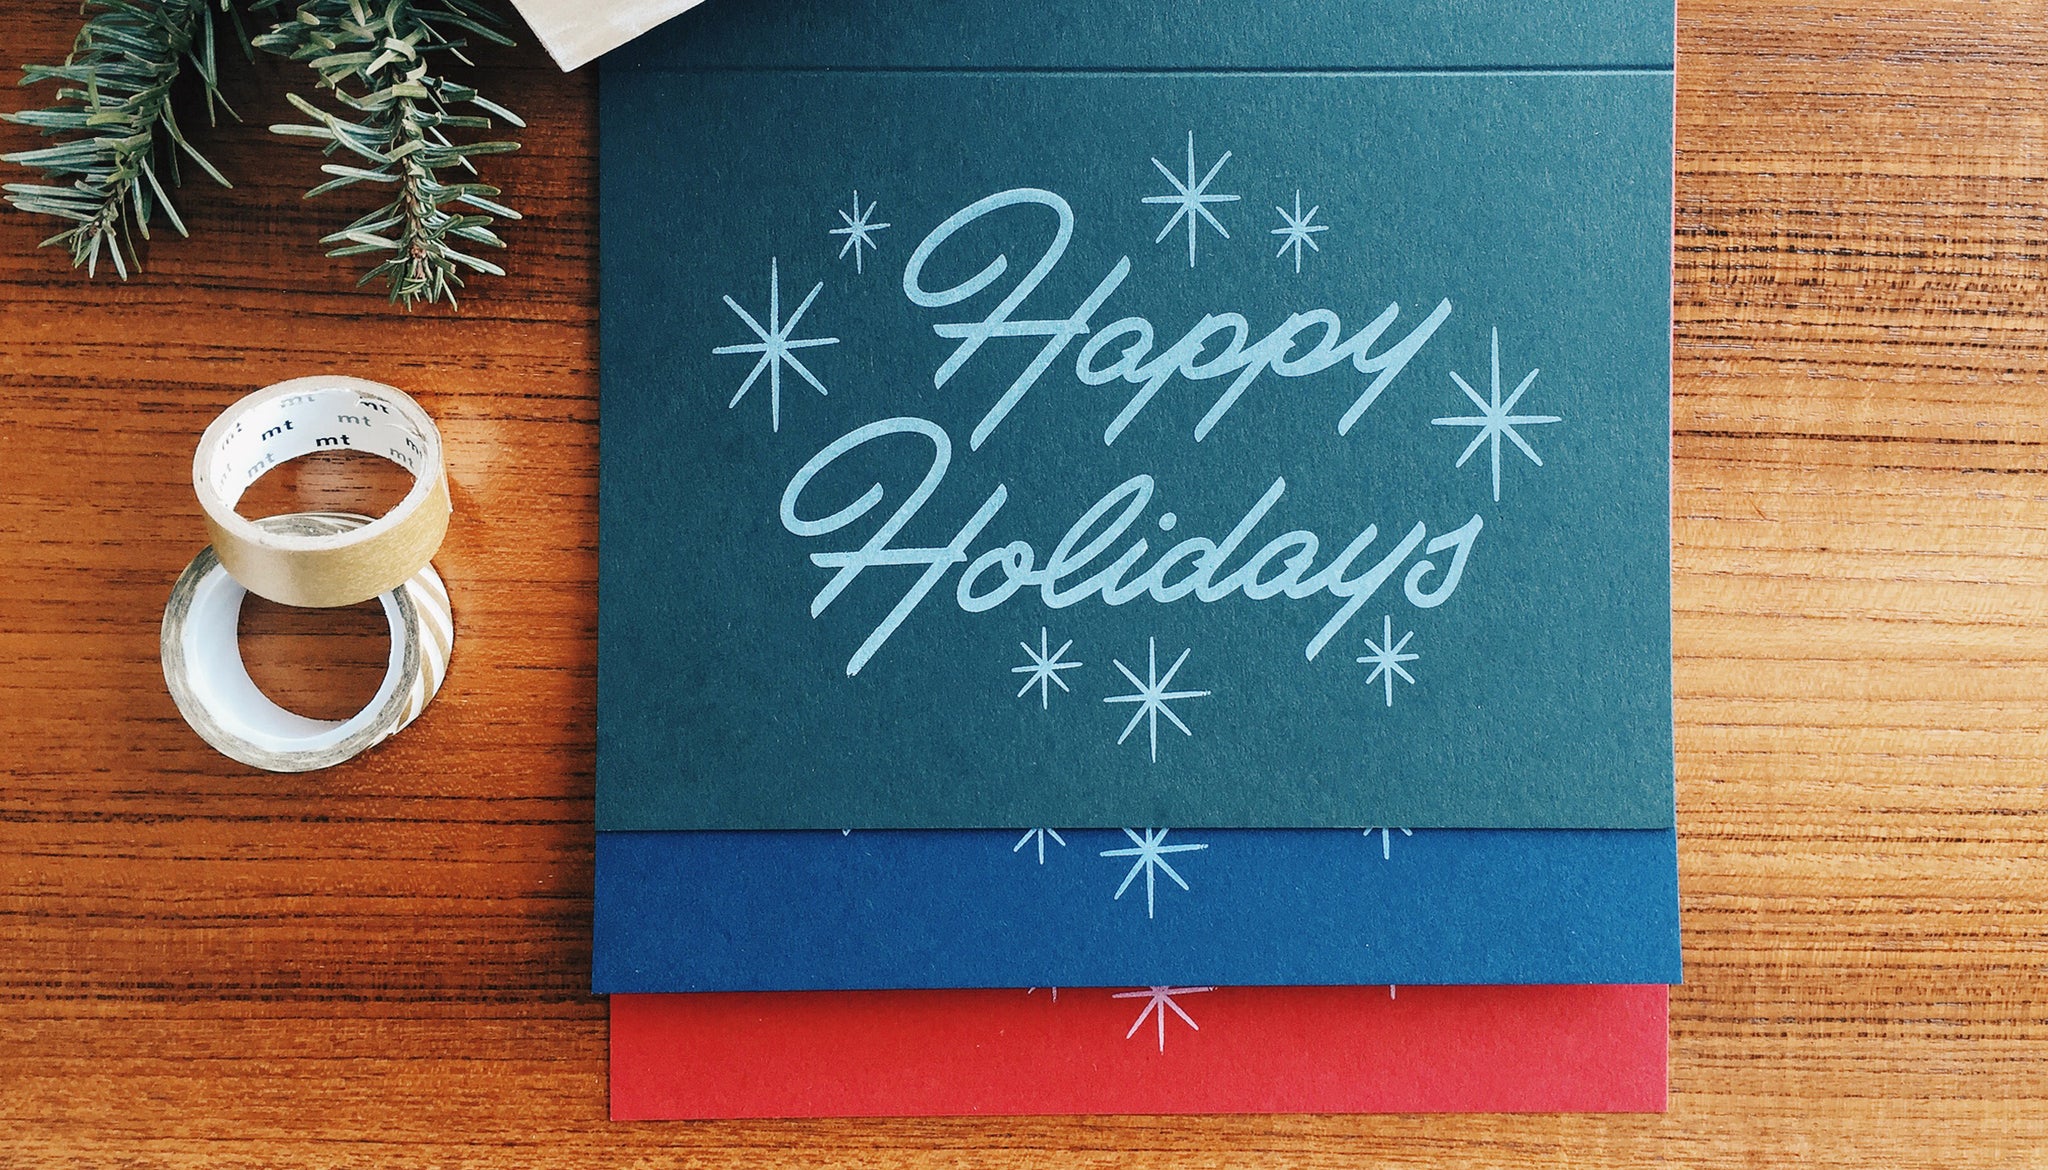
Once I had beautiful these rubber stamps in hand it was only a matter of getting the paper scored, trimmed and stamped!
The photography is one of the most crucial parts of putting out any product because each photo needs to tell you something about the product while grabbing your attention aesthetically. It's also important to take images that work well on each social media platform and to not necessarily go for a single photo that will work well on all platforms. When I'm taking pictures I'm always considering the proportions needed for Dribbble or Instagram posts that have set ratios and orientations. I often have to shoot the same setup in a few different orientations for promotion later.
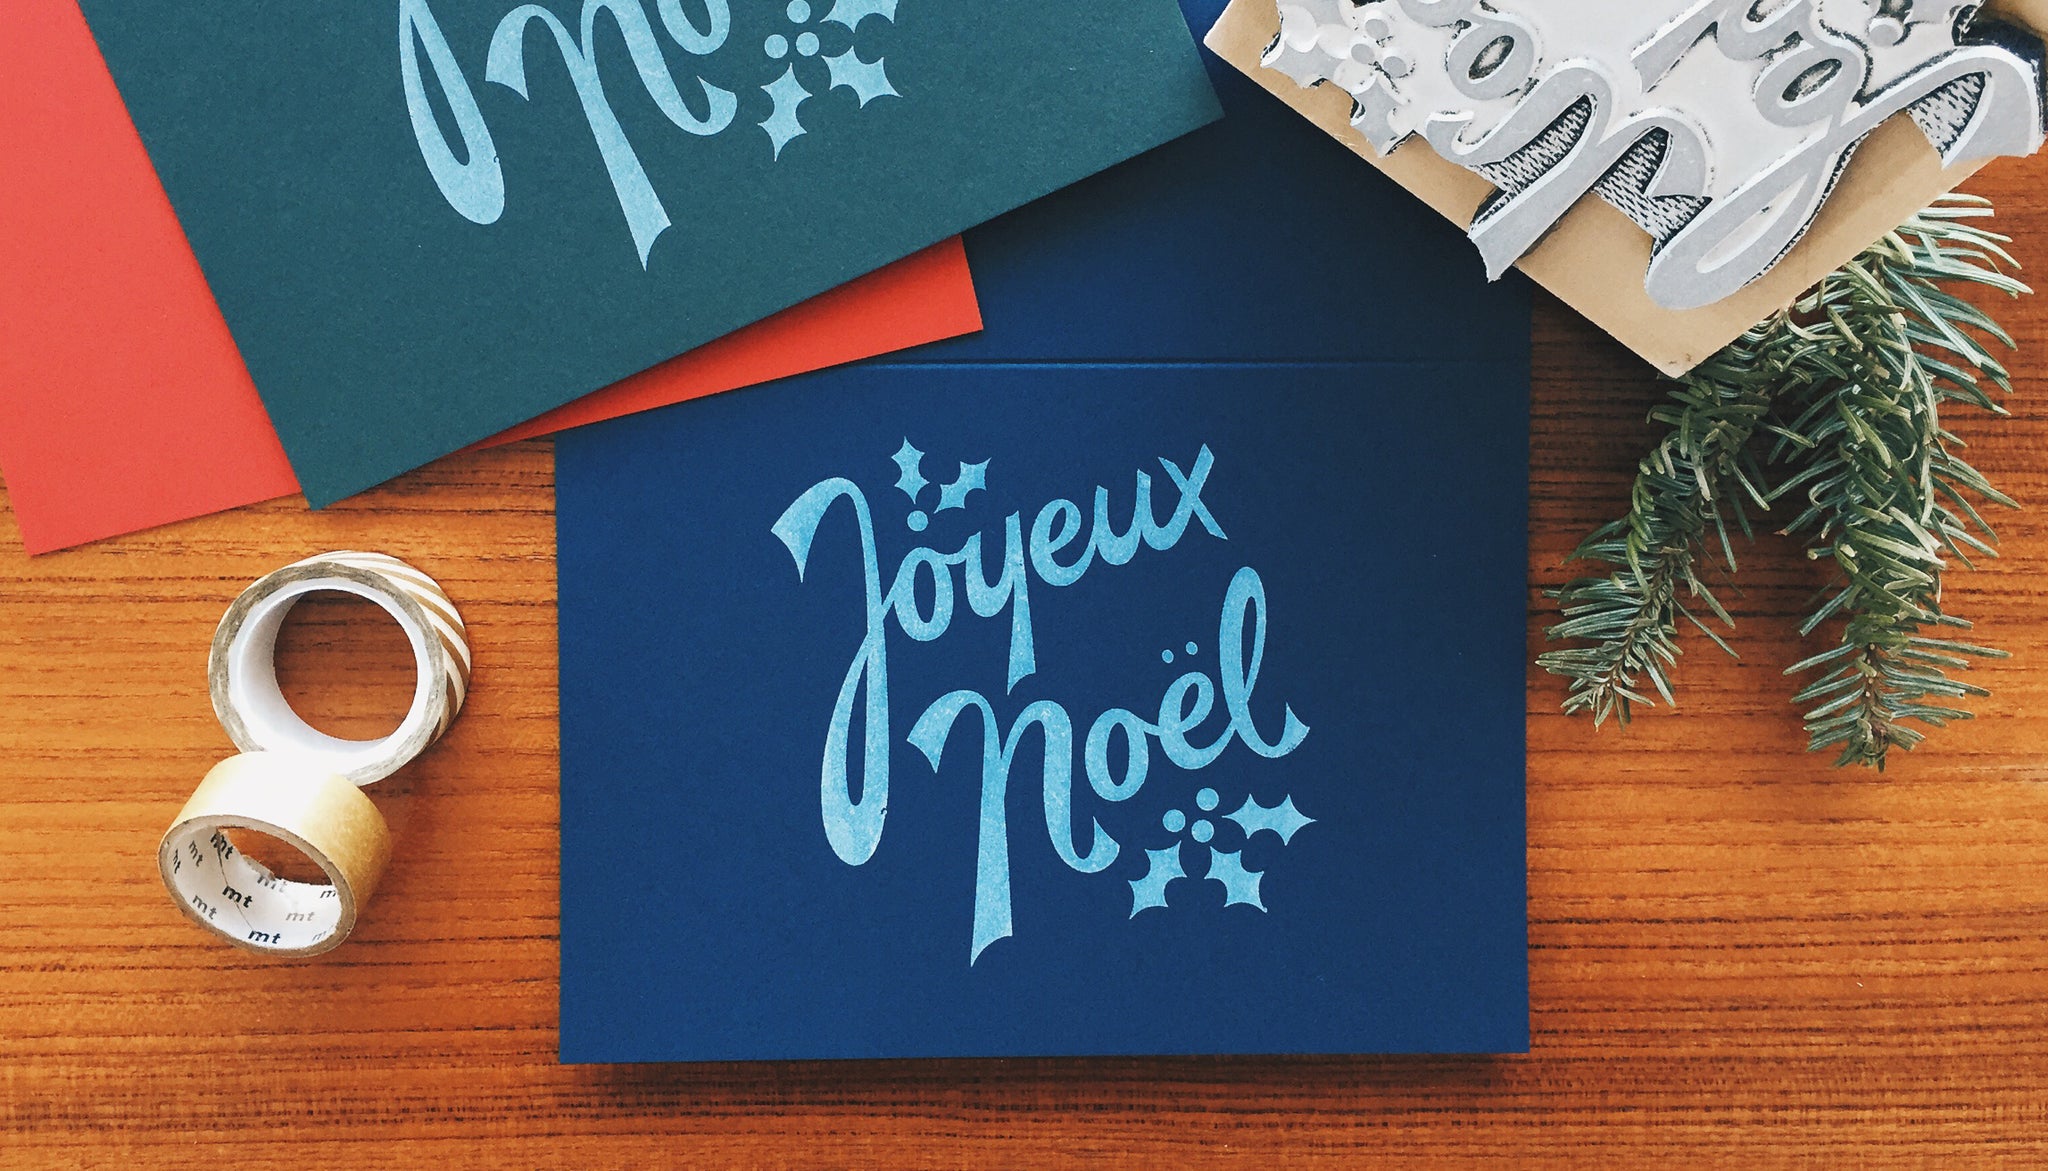
I also shoot and edit everything on my iPhone...yes my iPhone. After I got the cards stamped I cut a few small branches off our new christmas tree, cleared off our coffee table, moved it close to the window and started shooting. Good light and a few good props will take you far when it comes to getting solid product shots. My main concern when taking product images is maintaining a consistent color and style. After shooting the products I spend most of my time in VSCO trying to make sure the colors are accurate and even across the images. I also have to go in and make sure the images are level and square and that there aren't any strange distortions.
This shoot took me a few hours between shooting and editing but I was able to gather a number of great shots to use for email newsletters, Instagram posts, and other social media promotional images. Getting great photos for your products is good practice for also documenting your work. I'm really pleased with how everything turned out, and I hope you all enjoy the work that has gone into this project. Here are a few of my favorite shots from the shoot.
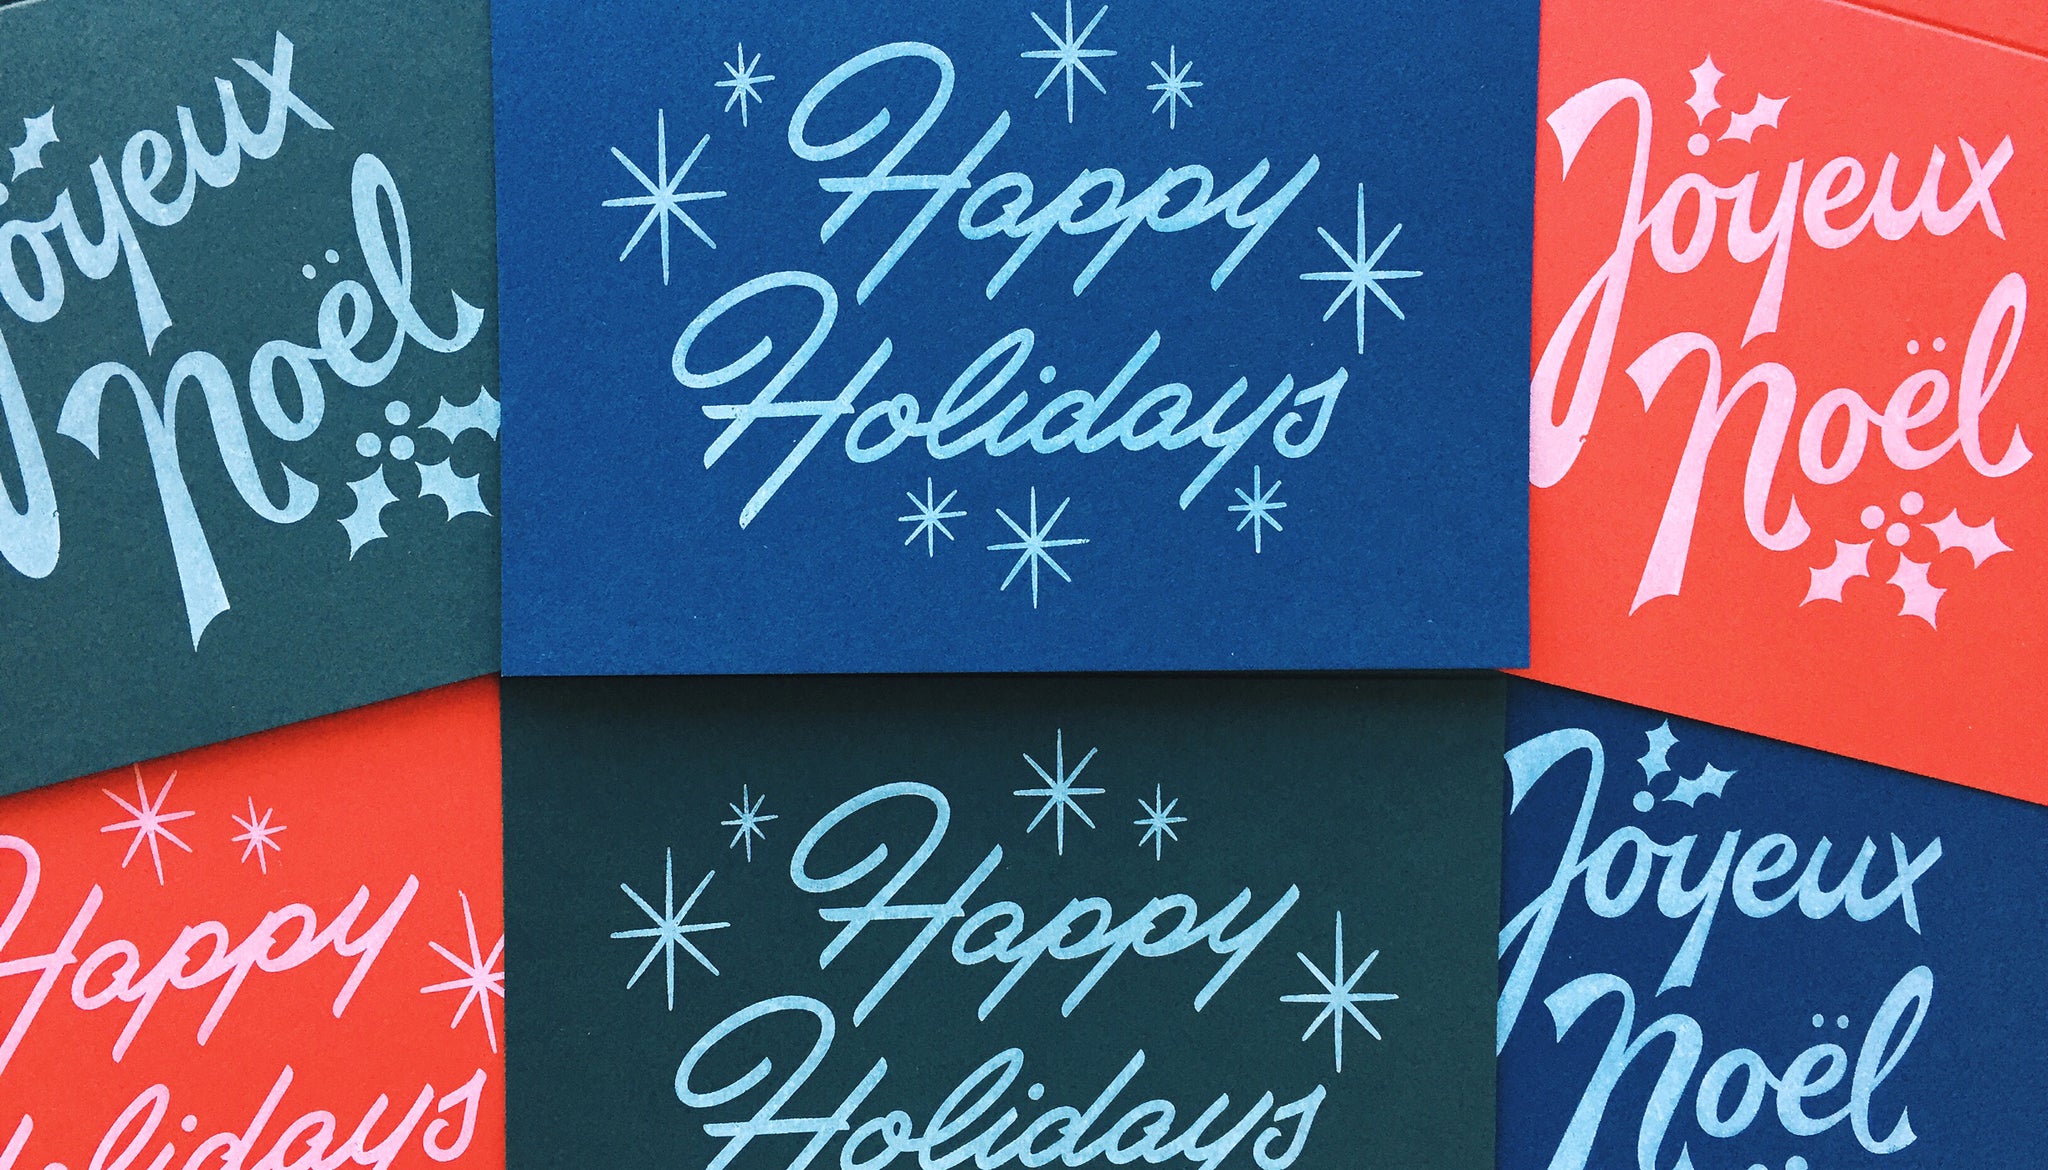

Happy Holidays everyone! We hope these cards bring you joy while also bringing you a little closer to the ones you love this holiday season. Enjoy.
Leave a comment